

How To Create Gui Python
Hey python developers, in Python Calculator tutorial you will learn to create a simple GUI calculator. In this post i will show you how to develop a simple calculator using tkinter module in python. So let's move further to create a simple python calculator.
Python offers a lot of options to develop GUI applications, but Tkinter is the most usable module for developing GUI(Graphical User Interface). Since Tkinter is cross-platform soit works on both windows and Linux. So here i am using Tkinter module to create a simple python calculator.
Python Calculator Tutorial – Getting Started With Tkinter
The fastest and easiest way of developing GUI applications in python is working with Tkinter. So let's took a quick look on Tkinter.
What is Tkinter
- The
Tkintermodule ("Tk interface") is the standard Python interface to the Tk GUI toolkit. - Both Tk and Tkinter are available on most Unix platforms, as well as on Windows systems.
- If you work on Linux/Ubuntu then you have to install Tkinter module on your machine for running programs, but on windows you don't need to install it because it comes with the default python installation.
Prerequisite For Python Calculator
For developing a simple GUI calculator in python you must have to prior knowledge of following –
- Tkinter
- Lambda
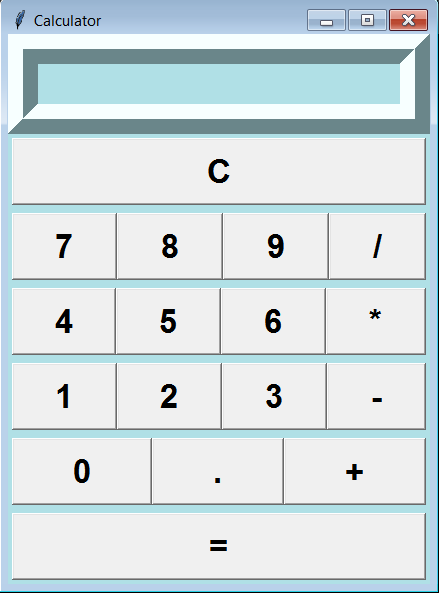
Look Of A Simple GUI Python Calculator
Look at this calculator. Yup this is looking very cool. So now we have to create this calculator in python.

On this calculator we can perform following simple mathematical calculations –
- Multiplication
- Addition
- Subtraction
- Division
And now we will start writing codes for making this. To create this we have to do four things –
- Importing Tkinter module
- Creating the main interface(window for calculator)
- Adding any number of widgets to the main interface
- Applying the event trigger on widgets
Creating Window For Calculator
First of all we will create a window of calculator. So write the following code.
| 1 2 3 4 5 6 7 8 9 10 11 12 13 14 15 16 17 18 19 20 21 22 23 24 25 26 | from tkinter import * # Creating frame for calculator def iCalc ( source , side ) : storeObj = Frame ( source , borderwidth=4 , bd=4 , bg="powder blue" ) storeObj . pack ( side=side , expand =YES , fill =BOTH ) return storeObj # Creating Button def button ( source , side , text , command=None ) : storeObj = Button ( source , text=text , command=command ) storeObj . pack ( side=side , expand = YES , fill=BOTH ) return storeObj class app ( Frame ) : def __init__ ( self ) : Frame . __init__ ( self ) self . option_add ( '*Font' , 'arial 20 bold' ) self . pack ( expand = YES , fill =BOTH ) self . master . title ( 'Calculator' ) # Start the GUI if __name__=='__main__' : app ( ) . mainloop ( ) |
Let's see the output.
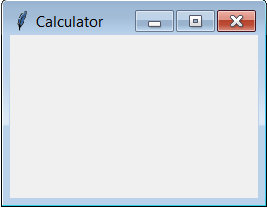
We have created this frame successfully, now lets move on ahead.
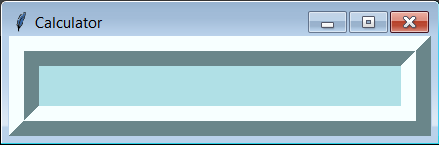
Adding Display Widget
For creating display widget write the following code inside the class app.
| display = StringVar ( ) Entry ( self , relief=RIDGE , textvariable=display , justify='right' , bd=30 , bg="powder blue" ) . pack ( side=TOP , expand=YES , fill=BOTH ) |
So now the output is –
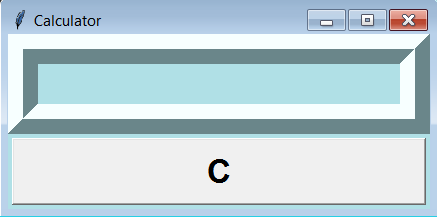
Adding Clear Button Widget
Now we will create a clear button. Whenever this button will be pressed all the stuffs from display will be erased. So write the following code for this.
| for clearButton in ( [ "C" ] ) : erase = iCalc ( self , TOP ) for ichar in clearButton : button ( erase , LEFT , ichar , lambda storeObj=display , q=ichar : storeObj . set ( '' ) ) |
And now you can see the output.
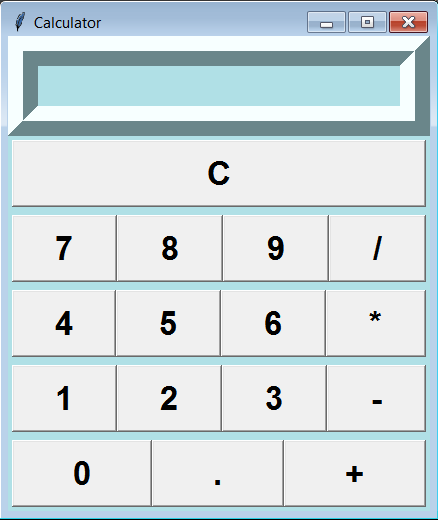
Adding Numbers And Symbols Widget
To add numbers and symbols inside the frame, you have to write the following code.
| for numButton in ( "789/" , "456*" , "123-" , "0.+" ) : FunctionNum = iCalc ( self , TOP ) for iEquals in numButton : button ( FunctionNum , LEFT , iEquals , lambda storeObj=display , q=iEquals : storeObj . set ( storeObj . get ( ) + q ) ) |
And now you can see the output. It's looking cool.
Adding Equal Button
For implementing Equal button write the following code.
| EqualButton = iCalc ( self , TOP ) for iEquals in "=" : if iEquals == '=' : btniEquals = button ( EqualButton , LEFT , iEquals ) btniEquals . bind ( '<ButtonRelease-1>' , lambda e , s=self , storeObj=display : s . calc ( storeObj ) , '+' ) else : btniEquals = button ( EqualButton , LEFT , iEquals , lambda storeObj=display , s=' %s ' % iEquals : storeObj . set ( storeObj . get ( ) + s ) ) |
So now our calculator looks like as below.
Applying Event Trigger On Widgets
Now the last thing but very important is to apply event triggers on widgets. It means whenever you click any widget some function will be performed. So write the following code
| def calc ( self , display ) : try : display . set ( eval ( display . get ( ) ) ) except : display . set ( "ERROR" ) |
Complete Code For Python Calculator
So now i am collecting and keeping all the above codes in one place. So our entire code for making a simple calculator in python is below.
| 1 2 3 4 5 6 7 8 9 10 11 12 13 14 15 16 17 18 19 20 21 22 23 24 25 26 27 28 29 30 31 32 33 34 35 36 37 38 39 40 41 42 43 44 45 46 47 48 49 50 51 52 53 54 55 56 57 58 59 60 61 62 | from tkinter import * def iCalc ( source , side ) : storeObj = Frame ( source , borderwidth=4 , bd=4 , bg="powder blue" ) storeObj . pack ( side=side , expand =YES , fill =BOTH ) return storeObj def button ( source , side , text , command=None ) : storeObj = Button ( source , text=text , command=command ) storeObj . pack ( side=side , expand = YES , fill=BOTH ) return storeObj class app ( Frame ) : def __init__ ( self ) : Frame . __init__ ( self ) self . option_add ( '*Font' , 'arial 20 bold' ) self . pack ( expand = YES , fill =BOTH ) self . master . title ( 'Calculator' ) display = StringVar ( ) Entry ( self , relief=RIDGE , textvariable=display , justify='right' , bd=30 , bg="powder blue" ) . pack ( side=TOP , expand=YES , fill=BOTH ) for clearButton in ( [ "C" ] ) : erase = iCalc ( self , TOP ) for ichar in clearButton : button ( erase , LEFT , ichar , lambda storeObj=display , q=ichar : storeObj . set ( '' ) ) for numButton in ( "789/" , "456*" , "123-" , "0.+" ) : FunctionNum = iCalc ( self , TOP ) for iEquals in numButton : button ( FunctionNum , LEFT , iEquals , lambda storeObj=display , q=iEquals : storeObj . set ( storeObj . get ( ) + q ) ) EqualButton = iCalc ( self , TOP ) for iEquals in "=" : if iEquals == '=' : btniEquals = button ( EqualButton , LEFT , iEquals ) btniEquals . bind ( '<ButtonRelease-1>' , lambda e , s=self , storeObj=display : s . calc ( storeObj ) , '+' ) else : btniEquals = button ( EqualButton , LEFT , iEquals , lambda storeObj=display , s=' %s ' % iEquals : storeObj . set ( storeObj . get ( ) + s ) ) def calc ( self , display ) : try : display . set ( eval ( display . get ( ) ) ) except : display . set ( "ERROR" ) if __name__=='__main__' : app ( ) . mainloop ( ) |
So now its time to see the calculator and you can perform any operation on it. So let's start your calculation.
Congratulations, We have created python calculator successfully, that's pretty cool, and i hope you have really enjoyed while making this. So surely comment your feelings about this.
Recommended Articles
- Python Simple HTTP Server : A Simple HTTP Web Server With Python
- Python Chatbot – Build Your Own Chatbot With Python
- Python Rest API Example using Bottle Framework
- PyGame Sprite Animation Tutorial – Simple Walk Loop
- Django Forms Example – Generating Forms with Django Form Class
- Speech Recognition Python – Converting Speech to Text
So Guys this was all about the Python Calculator Tutorial. I hope, you liked it and if it is helpful for you then please share it with others and help them in learning python. And if you have any question regarding this post then leave your queries in comment section. In upcoming posts i will come with some interesting python applications, and if you want to learn making any particular application then suggest me your idea, i will try to fulfill your need. Thanks All of you.
How To Create Gui Python
Source: https://www.simplifiedpython.net/python-calculator/
Posted by: randlejehing.blogspot.com
0 Response to "How To Create Gui Python"
Post a Comment